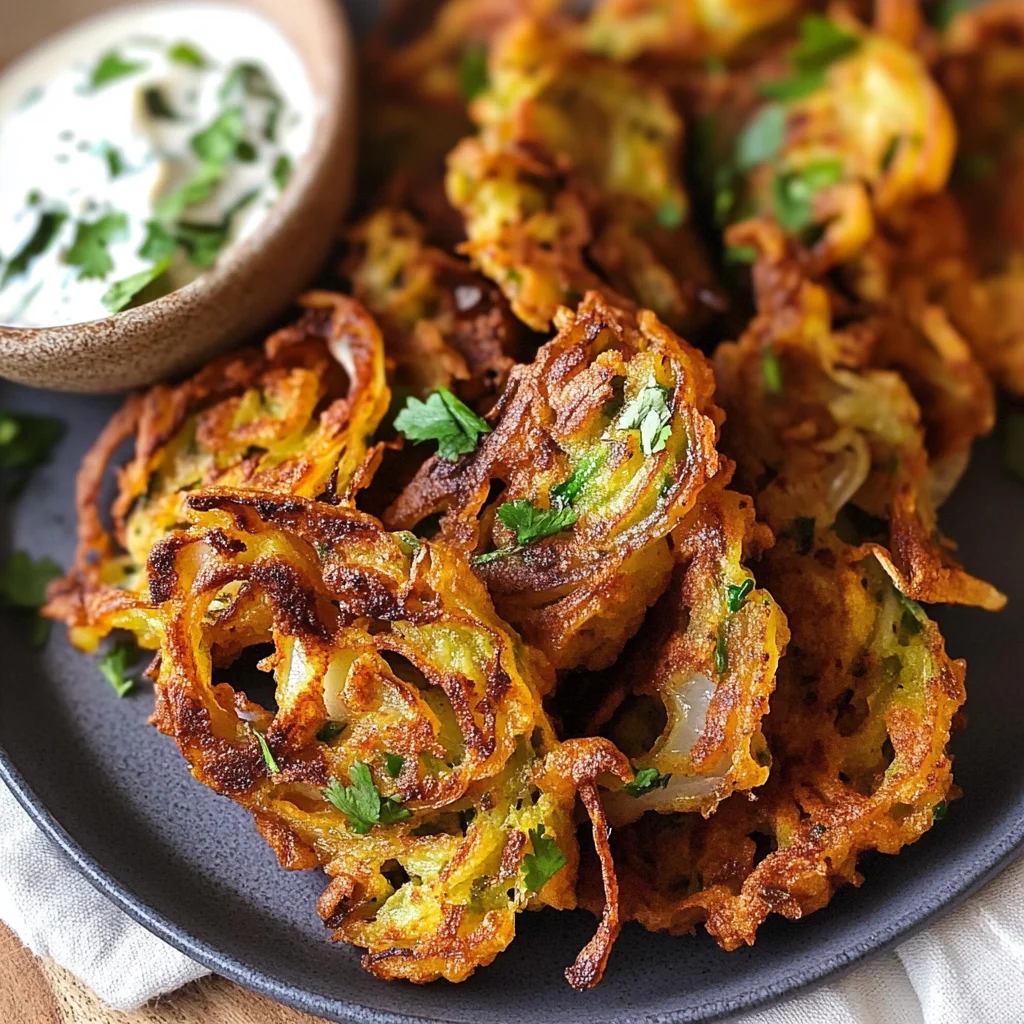
Indian Onion Bhaji
Enjoy crispy, light, flavorful homemade Indian onion bhaji with just one tablespoon of oil per 4 fritters! These delectable onion fritters are perfect for any occasion, whether as a snack, appetizer, or side dish. Their unique combination of spices and chickpea flour results in a delightful crunch that will impress your guests and family alike.
Why You’ll Love This Recipe
- Crispy Texture: The light batter creates a delightful crunch while keeping the onions tender.
- Easy to Make: With simple steps and minimal ingredients, this recipe is quick and hassle-free.
- Healthy Alternative: Using chickpea flour makes it gluten-free and packed with protein, making it a nutritious choice.
- Customizable Flavor: You can adjust the spiciness by adding more or less chili pepper according to your taste.
- Versatile Dish: Perfect as an appetizer, snack, or side dish for various meals.
Tools and Preparation
To prepare Indian onion bhaji efficiently, having the right tools on hand is essential. This will simplify your cooking process and help you achieve the best results.
Essential Tools and Equipment
- Mixing bowl
- Sharp knife or mandoline
- Large skillet
- Tongs
Importance of Each Tool
- Mixing bowl: A spacious bowl allows you to mix all ingredients thoroughly for an even batter.
- Sharp knife or mandoline: Ensures thinly sliced onions for perfect frying; uniform thickness promotes even cooking.
- Large skillet: Provides ample space for frying multiple fritters at once, reducing cooking time.
- Tongs: Helps to safely flip and remove the fritters without damage.
Ingredients
For the Onion Bhaji
- 2 medium onions (sliced)
- 1 cup chickpea flour
- 1 Tbsp nutritional yeast (optional)
- 3/4 tsp ground cumin
- 3/4 tsp salt
- 1/2 tsp ground turmeric
- 1/2 cup water
- 1 tsp lime juice (or lemon juice)
- 1 green hot chili pepper (finely chopped)
- 1 Tbsp parsley (chopped or cilantro)
- 3 Tbsp oil (for frying; coconut oil recommended)
How to Make Indian Onion Bhaji
Step 1: Prepare the Onions
First, peel and then use a sharp knife or mandoline to slice the onions into thin strips. Set them aside for later use.
Step 2: Make the Batter
In a medium-large mixing bowl, combine all remaining ingredients except the oil. Whisk until you achieve a medium-thick batter. If it’s too thick, add water gradually, one teaspoon at a time until desired consistency is reached.
Step 3: Combine Onions with Batter
Stir in the sliced onions using your hands. Ensure every piece is fully coated in the batter for an even flavor throughout.
Step 4: Heat Oil in Skillet
Heat a large skillet over medium heat with at least one tablespoon of coconut oil. Ensure it’s hot before proceeding to cook.
Step 5: Fry the Bhaji
Using tongs, drop small portions of the battered onions into the hot pan—cooking about four fritters at a time. Fry for approximately 2–4 minutes on each side until golden brown and crispy. Repeat this process with any remaining onion mixture.
Enjoy your homemade Indian onion bhaji as a delicious snack or appetizer!
How to Serve Indian Onion Bhaji
Indian onion bhaji is a versatile dish that can be enjoyed in various ways. Whether as an appetizer, snack, or side dish, its crispy texture and rich flavors make it a delightful addition to any meal. Here are some serving suggestions to enhance your dining experience.
With Chutneys
- Mint Chutney: A refreshing dip that complements the spices in the bhaji.
- Tamarind Sauce: Sweet and tangy, it balances the savory flavors of the fritters.
- Yogurt Dip: Creamy yogurt mixed with herbs provides a cooling contrast.
As a Snack
- Tea Time Treat: Serve hot bhajis with a cup of masala chai for a classic pairing.
- Party Appetizer: Place them on a platter for guests to enjoy at gatherings.
In Wraps
- Vegetable Wraps: Add bhajis to wraps with fresh vegetables and sauces for a filling meal.
- Pita Pockets: Stuff warm pita bread with onion bhaji and toppings for an easy lunch.
How to Perfect Indian Onion Bhaji
To achieve the ultimate crispy texture and flavor in your Indian onion bhaji, consider these tips.
- Use Fresh Ingredients: Always opt for fresh onions and spices to enhance the flavor profile.
- Adjust Water Carefully: Control the water content in your batter; it should be thick enough to coat the onions without being too runny.
- Heat Oil Properly: Ensure your oil is hot enough before frying; this prevents sogginess and promotes crispiness.
- Fry in Batches: Avoid overcrowding the pan, which can lower the oil temperature and affect cooking time.
- Let Them Rest: Allow fried bhajis to sit on paper towels briefly to absorb excess oil before serving.
Best Side Dishes for Indian Onion Bhaji
Pairing Indian onion bhaji with complementary side dishes can elevate your meal. Here are some excellent options:
- Cucumber Raita: A cool, creamy yogurt-based side that balances the spiciness of bhaji.
- Spiced Rice: Flavored basmati rice adds a fragrant touch that pairs well with crispy fritters.
- Mixed Vegetable Salad: Fresh veggies provide crunch and freshness alongside rich bhajis.
- Samosas: These stuffed pastries offer another layer of texture and flavor—great for sharing!
- Chickpea Curry: A hearty curry can create a satisfying meal when served alongside onion bhaji.
- Naan Bread: Soft naan serves as an excellent accompaniment for scooping up delicious dips or curry.
Common Mistakes to Avoid
Making Indian onion bhaji can be simple, but a few common mistakes can ruin your batch. Here are some pitfalls to watch out for:
- Using too much oil: Overcrowding the pan with fritters or using excessive oil can lead to greasy bhajis. Stick to one tablespoon of oil per batch for perfect crispiness.
- Neglecting the batter consistency: A batter that’s too thick or too thin will affect the texture. Aim for a medium-thick batter; add water gradually if needed.
- Not slicing onions thinly enough: Thick onion slices can result in soggy fritters. Ensure you slice them as thin as possible for better frying results.
- Skipping seasoning adjustments: If you prefer more flavor, adjust spices according to your taste. Don’t hesitate to experiment with herbs and spices!
- Frying at incorrect temperature: Cooking at too low heat will make the bhaji absorb more oil, while too high heat can burn them. Maintain a steady medium heat for even cooking.

Storage & Reheating Instructions
Refrigerator Storage
- Store leftover Indian onion bhaji in an airtight container.
- They will last for up to 3 days in the refrigerator.
Freezing Indian Onion Bhaji
- Allow bhajis to cool completely before freezing.
- Place them in a freezer-safe container or bag, separating layers with parchment paper.
- They can be frozen for up to 2 months.
Reheating Indian Onion Bhaji
- Oven: Preheat the oven to 350°F (175°C). Place bhaiji on a baking sheet and heat for about 10 minutes until crispy.
- Microwave: Heat for 30-60 seconds on high. This method is quick but may not retain crispiness.
- Stovetop: Reheat in a skillet over medium heat, adding a little oil if desired, flipping until warmed through and crispy again.
Frequently Asked Questions
Here are some common questions about making Indian onion bhaji that might help clarify any doubts.
How do I achieve crispy Indian Onion Bhaji?
To ensure crispiness, maintain the right batter consistency and fry at a steady medium heat. Avoid overcrowding the pan.
Can I add other vegetables to my Indian Onion Bhaji?
Yes! Feel free to include finely chopped vegetables like spinach or bell peppers for added nutrition and flavor.
What can I serve with Indian Onion Bhaji?
These fritters go well with chutneys like mint or tamarind or alongside a fresh salad for a well-rounded dish.
Is this Indian Onion Bhaji recipe gluten-free?
Absolutely! This recipe uses chickpea flour, making it naturally gluten-free and perfect for those avoiding gluten.
Final Thoughts
This Indian onion bhaji recipe is not only easy but also incredibly versatile. You can customize it by adding your favorite spices or vegetables. Whether served as an appetizer, snack, or side dish, these delicious fritters are bound to impress everyone at your table!
Indian Onion Bhaji

Enjoy the delightful crunch of homemade Indian Onion Bhaji, a perfect fusion of spices and chickpea flour that creates a crispy, light snack or appetizer. These flavorful onion fritters are not only easy to prepare but also customizable to suit your taste preferences. With just one tablespoon of oil per batch, they offer a healthier alternative without sacrificing flavor. Whether you’re hosting a gathering or simply enjoying a quiet evening at home, these bhajis are sure to impress family and friends alike.
- Prep Time: 15 minutes
- Cook Time: 20 minutes
- Total Time: 35 minutes
- Yield: Approximately 8 servings 1x
- Category: Snack/Appetizer
- Method: Frying
- Cuisine: Indian
Ingredients
- 2 medium onions (sliced)
- 1 cup chickpea flour
- 3/4 tsp ground cumin
- 3/4 tsp salt
- 1/2 tsp ground turmeric
- 1/2 cup water
- 1 tsp lime juice
- 1 green hot chili pepper (finely chopped)
- 3 Tbsp coconut oil (for frying)
Instructions
- Slice the onions thinly using a sharp knife or mandoline and set aside.
- In a mixing bowl, combine chickpea flour, cumin, salt, turmeric, water, lime juice, and chili pepper; whisk until you achieve a medium-thick batter.
- Fold in the sliced onions until well-coated.
- Heat coconut oil in a large skillet over medium heat.
- Drop small portions of the batter into the hot oil, frying about four fritters at a time for 2–4 minutes on each side until golden brown.
Nutrition
- Serving Size: 2 fritters (approximately 80g)
- Calories: 165
- Sugar: 0g
- Sodium: 275mg
- Fat: 8g
- Saturated Fat: 7g
- Unsaturated Fat: 1g
- Trans Fat: 0g
- Carbohydrates: 20g
- Fiber: 5g
- Protein: 5g
- Cholesterol: 0mg