Dairy Free Bread
My dairy-free bread recipe is easy to make and yields the most crusty, fluffy bread ever. No yeast needed. This delicious dairy free bread is perfect for breakfast, sandwiches, or just as a side with your favorite meals. Its simple ingredients and quick prep time make it an ideal choice for busy days or special occasions.
Why You’ll Love This Recipe
- Quick and Simple – With no yeast and minimal ingredients, this recipe is perfect for beginners.
- Fluffy Texture – The combination of curdled milk and baking soda creates a wonderfully light and airy bread.
- Versatile Uses – Enjoy it toasted with jam, as a sandwich base, or alongside soups and salads.
- Gluten-Free Option – Easily swap in gluten-free flour to make this recipe suitable for those with gluten sensitivities.
- No Special Equipment Needed – All you need is a mixing bowl, a baking tray, and basic kitchen tools.
Tools and Preparation
Before diving into the recipe, gather your tools to ensure a smooth baking experience.
Essential Tools and Equipment
- Mixing bowl
- Baking tray
- Measuring cups
- Sharp knife
- Parchment paper
Importance of Each Tool
- Mixing bowl – A sturdy bowl allows you to mix all ingredients thoroughly without spilling.
- Baking tray – A lined tray ensures easy transfer of the dough and prevents sticking during baking.
- Sharp knife – Using a sharp knife helps create clean cuts in the dough for even cooking.
Ingredients
Ingredients:
– 1 cup milk of choice (I used oat milk)
– 2 tablespoons white vinegar
– 2 cups all-purpose flour (Use gluten-free, if needed)
– 1/2 teaspoon baking soda
– 1/2 teaspoon salt
– 1 tablespoon sugar
How to Make Dairy Free Bread
Step 1: Preheat the Oven
Preheat the oven to 200C/400F. Line a large baking tray with parchment paper and set aside.
Step 2: Prepare the Milk Mixture
In a small bowl, add the milk of choice along with the white vinegar. Let it sit until it curdles, which takes about 10 minutes.
Step 3: Combine Dry Ingredients
In a large mixing bowl, add the all-purpose flour, salt, sugar, and baking soda. Mix well.
Step 4: Mix Wet and Dry Ingredients
Using a 1/4 cup, add your curdled milk into the dry mixture in two increments. Gently mix until just combined; be careful not to overmix.
Step 5: Shape the Dough
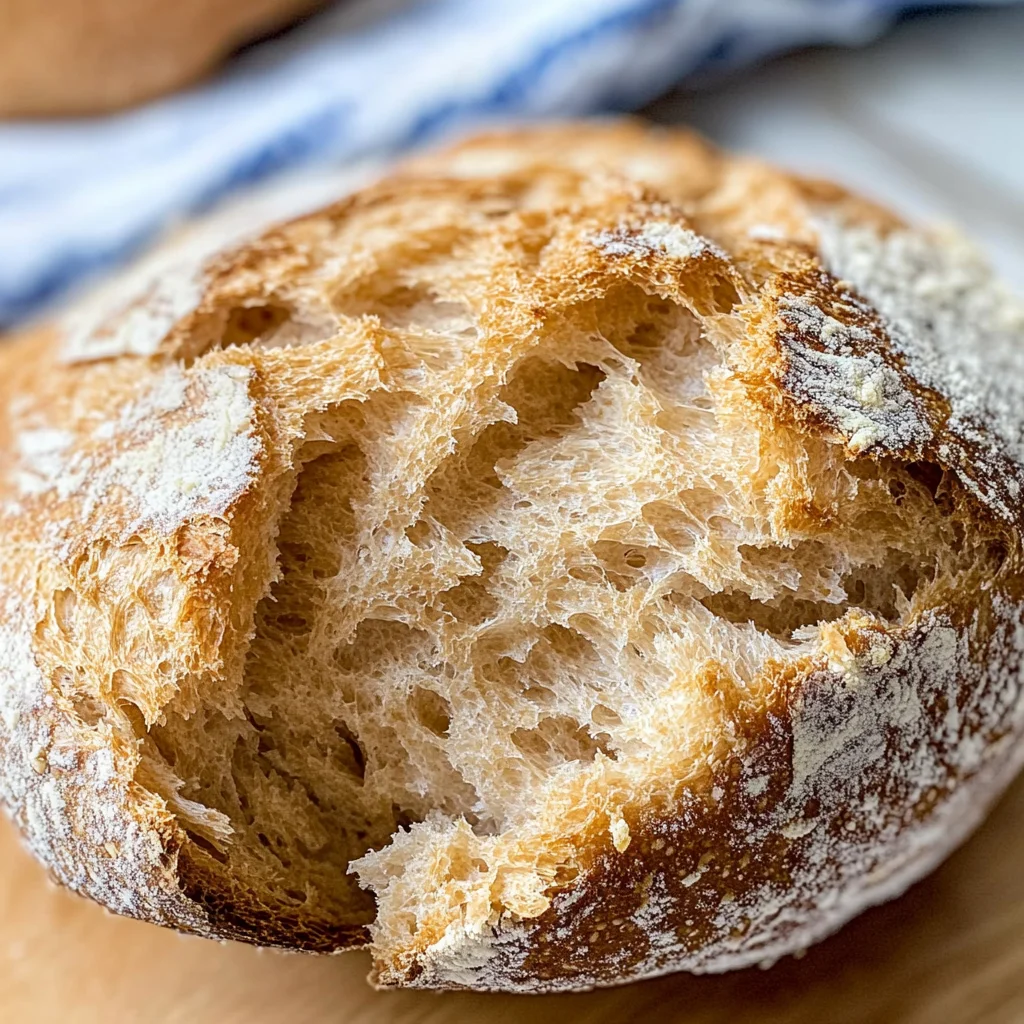
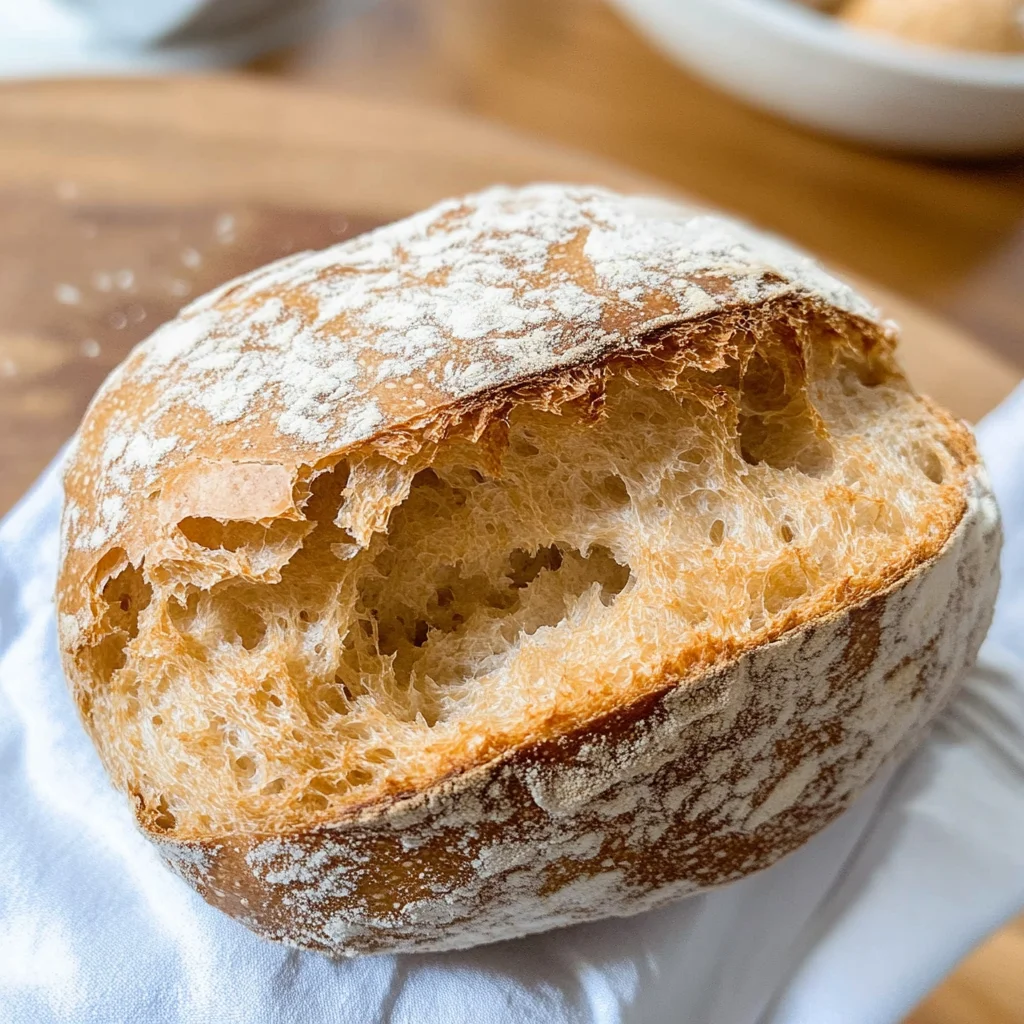
Lightly flour a kitchen surface. Sprinkle a tablespoon of flour on top of the dough. Transfer it to the floured surface. Gently knead the dough about 8-10 times until it forms a dome shape. The dough should still be quite sticky. Using a sharp knife, slice twice across the dough to form a cross shape about half an inch thick.
Step 6: Bake the Bread
Transfer the shaped dough onto the lined tray. Bake for 20-25 minutes. Check around the 20-minute mark; it’s done when golden brown on top and sounds hollow when tapped from beneath.
Step 7: Cool Down
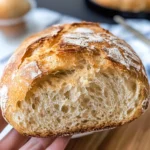
Remove from oven and allow to cool on the tray completely before slicing and toasting.
Enjoy your freshly baked dairy free bread!
How to Serve Dairy Free Bread
Dairy free bread is versatile and can be enjoyed in many ways. Whether you’re looking for a quick breakfast option or a delightful snack, here are some creative serving suggestions.
Toast with Avocado
- Spread ripe avocado on toasted dairy free bread for a creamy and nutritious start to your day.
Peanut Butter and Banana
- Top slices of the bread with peanut butter and banana slices for a sweet and satisfying treat.
Hummus and Veggies
- Serve your dairy free bread with hummus and sliced vegetables for a healthy appetizer or snack.
Garlic Bread
- Brush the bread with olive oil, garlic, and herbs, then toast it for a delicious garlic bread experience.
Sandwiches
- Make hearty sandwiches using your favorite fillings such as turkey, lettuce, and tomato for lunch or dinner.
French Toast
- Dip slices of dairy free bread in a mixture of almond milk and cinnamon, then fry until golden for a delightful breakfast.
How to Perfect Dairy Free Bread
Creating the perfect dairy free bread is all about technique. Here are some tips to ensure your loaf turns out fantastic every time.
-
Use Fresh Ingredients: Always check that your flour and baking soda are fresh for the best rise and texture.
-
Don’t Over-Mix: Gently combine the ingredients until just mixed to keep the texture light and fluffy.
-
Knead Lightly: A gentle knead will help develop structure without making the dough tough.
-
Check Oven Temperature: Ensure your oven is properly preheated; an incorrect temperature can affect baking time.
-
Let it Cool Before Slicing: Allowing the bread to cool fully helps maintain its shape when slicing.
Best Side Dishes for Dairy Free Bread
Pairing side dishes with dairy free bread can enhance your meal. Here are some fantastic options to consider.
- Mixed Green Salad – A fresh salad with various greens pairs well for a light lunch or dinner option.
- Vegetable Soup – A warm bowl of vegetable soup complements the crusty texture of the bread beautifully.
- Chili – Serve alongside chili for a hearty meal; perfect for colder days.
- Roasted Vegetables – Roasted seasonal veggies add flavor and nutrition, making a great addition to your plate.
- Fruit Salad – A refreshing fruit salad offers a sweet contrast to savory dishes served with the bread.
- Eggs Any Style – Pairing with scrambled or fried eggs makes for an excellent breakfast or brunch option.
Common Mistakes to Avoid
Making dairy-free bread can be simple, but avoiding common pitfalls will ensure your bread turns out fluffy and delicious.
- Using the wrong milk: Choose a milk alternative that curdles well, like oat or almond milk. This helps achieve the right texture.
- Skipping the vinegar step: Allowing the milk to sit with vinegar is crucial for creating a buttermilk substitute that enhances flavor and texture.
- Over-kneading the dough: Knead gently and only until combined; over-kneading can lead to dense bread instead of a light loaf.
- Not checking oven temperature: Always preheat your oven properly. An unreliable oven temperature can result in uneven baking.
- Ignoring cooling time: Letting the bread cool completely before slicing ensures it retains moisture and does not crumble easily.
Storage & Reheating Instructions
Refrigerator Storage
- Store in an airtight container for up to 3 days.
- Ensure it’s completely cooled before sealing to prevent sogginess.
Freezing Dairy Free Bread
- Wrap slices tightly in plastic wrap or foil, then place in a freezer-safe bag.
- It can be frozen for up to 3 months without losing its quality.
Reheating Dairy Free Bread
- Oven: Preheat to 180°C/350°F and warm for 10-15 minutes for best results.
- Microwave: Heat slices on high for about 20-30 seconds, but this may make it chewy.
- Stovetop: Toast in a pan over medium heat until warmed through and slightly crispy.
Frequently Asked Questions
How do I make dairy-free bread gluten-free?
You can use a gluten-free all-purpose flour blend instead of regular flour. Follow the same measurements as specified in the recipe.
Can I add herbs or spices to dairy-free bread?
Yes! Feel free to mix in herbs like rosemary or spices like garlic powder for an extra flavor boost.
What can I serve with dairy free bread?
This versatile bread pairs well with soups, salads, or spreads like hummus and avocado.
How long does dairy free bread last?
When stored properly, dairy-free bread lasts up to 3 days in the fridge or 3 months in the freezer.
Can I make this recipe with whole grain flour?
Yes, using whole grain flour will give your bread a nuttier flavor and more nutrients. Adjust liquid as needed for consistency.
Final Thoughts
This dairy-free bread recipe is not only easy to make but also incredibly versatile. You can customize it by adding your favorite herbs or spices. Whether you enjoy it plain, toasted, or as part of a meal, this delightful bread will surely become a staple in your kitchen!
Dairy-Free Bread
Indulge in the delightful simplicity of homemade dairy-free bread. This easy, no-yeast recipe produces a crusty, fluffy loaf that’s perfect for breakfast, sandwiches, or as a side dish for any meal. With just a few simple ingredients and minimal prep time, you can create a delicious bread that meets dietary needs without compromising on flavor. Ideal for busy days or special occasions, this versatile bread accommodates gluten-free options and can be customized with your favorite herbs or spices. Whether you enjoy it toasted with avocado or as part of a hearty sandwich, this dairy-free delight will quickly become a staple in your kitchen.
- Prep Time: 15 minutes
- Cook Time: 25 minutes
- Total Time: 40 minutes
- Yield: About 10 slices 1x
- Category: Bread
- Method: Baking
- Cuisine: American
Ingredients
- 1 cup milk of choice (e.g., oat milk)
- 2 tablespoons white vinegar
- 2 cups all-purpose flour (gluten-free if needed)
- 1/2 teaspoon baking soda
- 1/2 teaspoon salt
- 1 tablespoon sugar
Instructions
- Preheat oven to 200°C/400°F and line a baking tray with parchment paper.
- Combine milk and vinegar in a bowl; let sit until curdled (about 10 minutes).
- In a mixing bowl, whisk together flour, salt, sugar, and baking soda.
- Gradually mix the curdled milk into the dry ingredients until just combined to avoid overmixing.
- Transfer dough to a floured surface; gently knead and shape into a dome. Cut a cross into the top.
- Place on the prepared tray and bake for 20-25 minutes until golden brown and hollow sounding when tapped.
- Cool completely before slicing.
Nutrition
- Serving Size: 1 slice
- Calories: 150
- Sugar: 1g
- Sodium: 150mg
- Fat: 2g
- Saturated Fat: 0g
- Unsaturated Fat: 2g
- Trans Fat: 0g
- Carbohydrates: 30g
- Fiber: 1g
- Protein: 4g
- Cholesterol: 0mg